In January 2022, I did a 30-day project on “Why Your Business Needs to Adapt to Blockchain”. This post is a part of it. To know what I covered, learned, and executed in the project, visit this page.
In Part 1 of this series, I showed what the smart contract Token.sol looked like and then deployed it to the local network. In this post, I show:
- How to import your newly created token into your wallet, and
- How to send and receive this token through the Metamask wallet
Importing the Token to the Metamask Wallet
- The tokens go to the first account. So, I switched to the hh-test01 account. Then I clicked on Import tokens under Assets.

- I provided the addresses of the tokens that I had previously copied. It automatically imports the symbol ‘KB01’. Next, Token Decimal: 0 → Add Custom Token.

- The Token Balance is 1000. Next, Import Tokens.
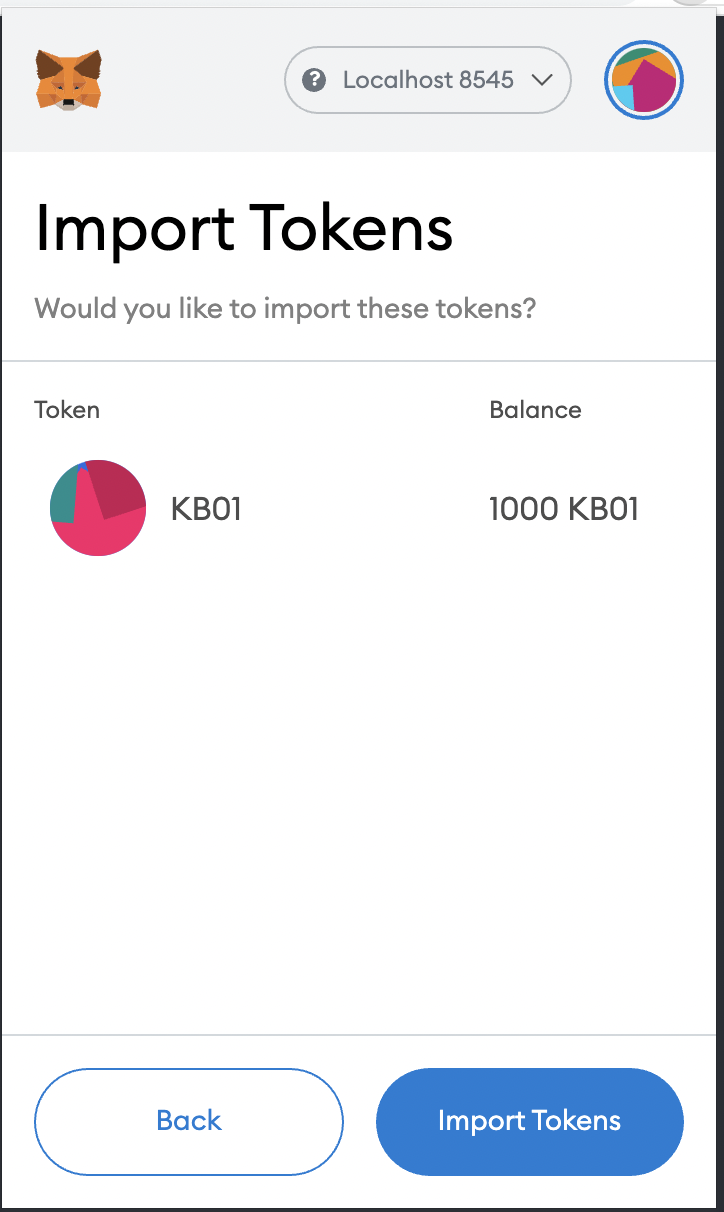
- Thus, the tokens are imported and show up in the Account Balance.

Exchanging the Newly Created Token Through Metamask
The token exchanging process is the same as before:
I switched to the recly-test02 account → Copied its public address → Went back to hh-test01 → Clicked on the KB01 token → Send → Pasted the copied address → Selected the amount → Next → Confirm.

So, as you can see, 10 KB01 tokens had been deducted from hh-test01.
Now, the same token needs to be imported to the recly-test02 account for it to show the balance. The importing process is the same as before. The same is transferred to recly-test02. Once imported, the balance shows under Assets.

Being able to exchange the token through Metamask is cool, but it would be better if we could exchange it directly through the web front-end we developed. I demonstrate how I did that in Part 3 of this series.
