In January 2022, I did a 30-day project on “Why Your Business Needs to Adapt to Blockchain”. This post is a part of it. To know what I covered, learned, and executed in the project, visit this page.
Now that we are clear with the fundamentals, I move on to the actual dApp development. It has four major stages. I explain them through four different blog posts. The stages are:
- Setting up Node.js, Hardhat, and Metamask on your system
- Writing the Hello World dApp
- Importing a node account into Metamask
- Deploying the Hello World dApp on the node
This post deals with the first stage. So, I started with setting up node.js.
- Setting Up Node.js
The first step is to set up node.js. l used Node Version Manager to do the setup. I went to nodejs.org, then to the downloads section, and downloaded the Mac version. You can download the Windows or Linux version, as applicable. Then I ran the installer.
Next, I went to Terminal on my Mac and entered the following command (found at the Nodejs’ official website):
curl -o- https://raw.githubusercontent.com/nvm-sh/nvm/v0.39.1/install.sh | bash

Once NVM was set up, I typed nvm install –lts to install the latest long-term support version of Nodejs.
Lastly, I entered the following command found at the bottom to run nvm:
export NVM_DIR=”$HOME/.nvm” [ -s “$NVM_DIR/nvm.sh” ] && \. “$NVM_DIR/nvm.sh” # This loads nvm [ -s “$NVM_DIR/bash_completion” ] && \. “$NVM_DIR/bash_completion” # This loads nvm bash_completion

To make sure node is working, I typed node –version.

It returned v16.13.1, so it was working.
I also checked for the Node Package Manager and Node Package Executor versions to make sure they were working.

Both of them were.
- Installing Metamask on the Browser
I opened the browser (Chrome in my case). Next, i went to metamask.io
- Download for Chrome → Install Metamask for Chrome → Add to Chrome → Get Started → Create a Wallet → Agree
- Use a secure password as you’ll be using it for a lot of projects later on.
- Safely secure your secret phrase that will be used to recover your account. No one can help you recover your secret recovery phrase.
- Once started, Settings → Advanced → Show test networks
- Setting Up Hardhat
To set up Hardhat, I first had to create a basic empty React app. I used the command npx create-react-app react-dapp to create the empty app with the name “react-dapp”.

Since my goal in this exercise was not to get deep into how React or Node works, I only used them superficially to achieve our end goal of creating a basic dApp.

It took about a minute and was finally set up. Next, I changed the directory to this app:
cd react-dapp
Next, I installed some packages for Hardhat to work using the following command:
npm install ethers hardhat @nomiclabs/hardhat-waffle \ ethereum-waffle chai \ @nomiclabs/hardhat-ethers

After setting up Hardhat, I created a Hardhat configuration using the command: npx hardhat
I selected ‘Create a basic sample project’
Next, I made a slight change to the hardhat configuration. I used the command vi hardhat.config.js to enter vi to edit the file.
I went to module.exports and added the paths and networks. Networks are used to create a node on the local machine with the identifier 1337 that Metamask requires by default.

Then, I typed :wq to save the changes and quit vi.
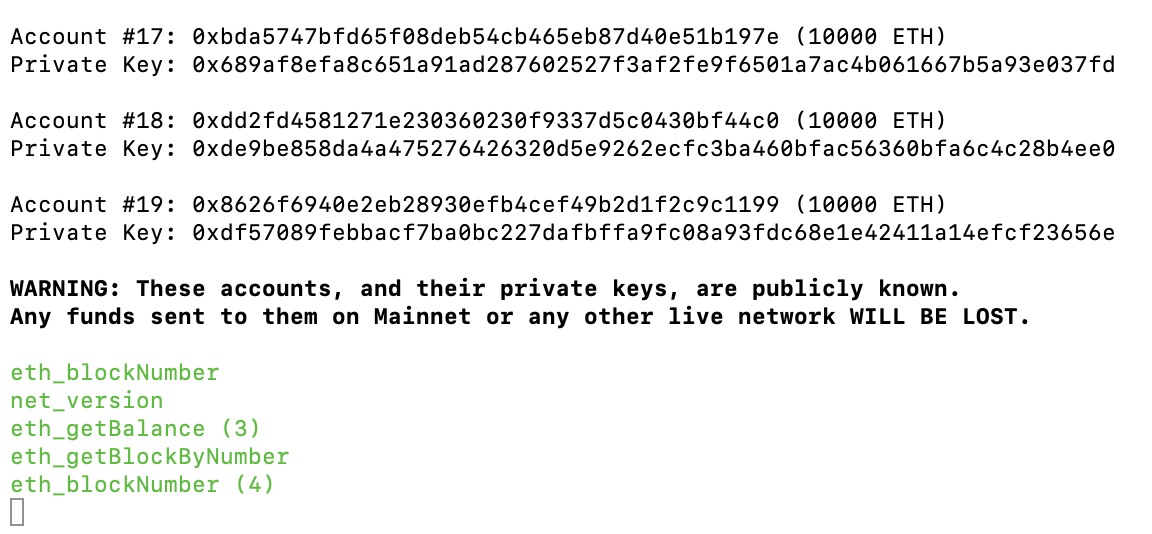
Now that I had set up the file to allow creating nodes on the machine, I created the node next. I used the command npx hardhat node
This started the node and I had a blockchain up and running.

It had created a number of accounts for me with the public key and private key pairs. Public keys are the top lines of each account and private keys are the bottom lines. Public keys are shared with people and private keys are secret. Since Hardhat has the account details hardcoded, you must not use these details on any global network such as Ropsten Testnet, etc. These details are only supposed to be used on your local network.
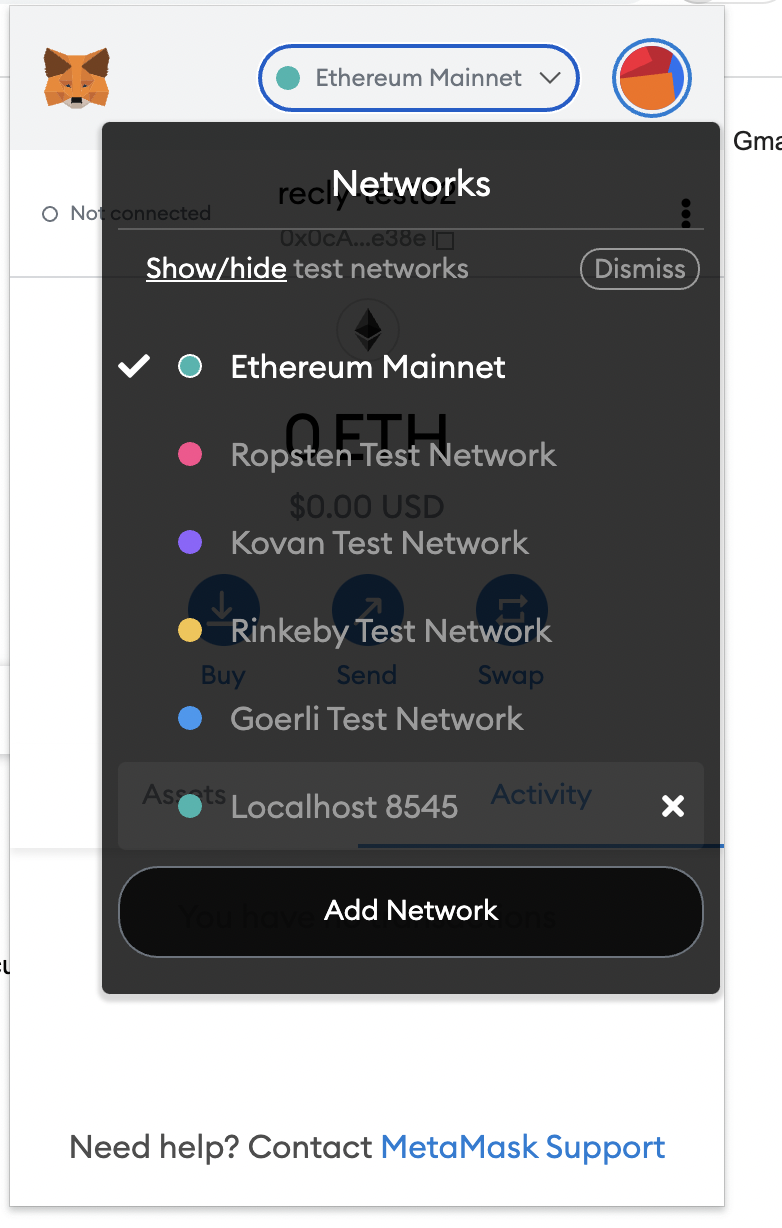
- Adding the Local Network’s configuration to Metamask
I went to Google Chrome. The default network selection was Ethereum Mainnet. Unlike the fake accounts of Hardhat with 10000 Eth each, I do not have any Eth on the Mainnet which is the real world Ethereum network that works with actual Ether.

I clicked on the dropdown and selected the local network: Localhost 8545.

The Terminal responded with a few lines (in green).
So, thus I had created a node and connected my wallet to the node. Next, I had to write the actual smart contract. I explain how I did that in Part 3 of the series.
